Create QR Code in WinUI
In this tutorial, we are going to illustrate how to create a standards-compliant QR Code barcode in a WinUI (Windows UI Library) Desktop project. WinUI is a user experience framework that unites Win32 and UWP developers to a common API for developing apps with modern user interfaces in Windows. The creation of a QR Code barcode involves the use of a .NET Standard 2.0 class library for encoding input data and a Microsoft WinUI Canvas for displaying barcode. The class library ensures the the QR Code compliance with the ISO/IEC 18004:2015 standards by validating input data, generating Error Correction Codewords, and applying necessary QR Code mask patterns.
The class library returns a text string in the format of ones (1 - Black) and zeros (0 - White). This string provides the flexibility of rendering QR Code in components such as a WinUI Canvas (reference code in this tutorial), other .NET Canvas, or System.Drawings. The QR Code can also be displayed by placing the text string into a WinUI TextBlock, TextBox, or RichTextBlock, and then applying a QR Code font (part of ConnectCode QR Code package). Finally, many modern document formats such as Microsoft Word and Adobe PDF support font embedding. This means a Line of Business (LOB) app can generate a document that includes a high-quality QR Code barcode by just using a text string and a QR Code font embedded into the document.
Prerequisite
- ConnectCode QR Code package is installed
- Visual Studio 2019 16.9 (or onwards)
- WinUI 3.0 (Project Reunion 0.5 or onwards)
1. Launch Visual Studio and create a new project. Select the "Blank App, Packaged (WinUI in Desktop)" C# template and click on the Next button.

2. In Configure your new project dialog, enter "WinUIQRCodeApp" as Project name, leave everything else as default values, and click on the Create button. A Visual Studio solution containing WinUIQRCodeApp and WinUIQRCodeApp (Package) is created.

3. Next, we add the QR Code class library available in nuget.org to the project. In the Solution Explorer, right-click on WinUIQRCodeApp and select Manage Nuget Packages. In the Nuget Package Manager shown below, click on Browse and search for "ConnectCode QR Code". Select "NETStandardQRCode" and click on Install to add the class library.

4. Add the QR Code font into the WinUIQRCodeApp Visual Studio project by right-clicking on WinUIQRCodeApp project in Solution Explorer. Select Add -> New Folder and name the folder as "Fonts". Next, right-click on "Fonts" folder, select Add -> Existing Item and navigate to the following folder:
C:\Program Files (x86)\ConnectCodeQRCode

(or C:\Program Files (x86)\ConnectCodeQRCodeTrial if you are using the Trial version)
Select the QR Code font:
- CCodeQR.ttf (or CCodeQR_Trial.ttf)
5. We have added a QR Code class library and a QR Code font to the project. As described in the overview, we are going to generate a QR Code using the library and then display it on a WinUI Canvas or with a barcode font. Click on MainPage.xaml in Solution Explorer and change the XAML to the following:
<Window
    x:Class="WinUIQRCodeApp.MainWindow"
    xmlns="http://schemas.microsoft.com/winfx/2006/xaml/presentation"
    xmlns:x="http://schemas.microsoft.com/winfx/2006/xaml"
    xmlns:local="using:WinUIQRCodeApp"
    xmlns:d="http://schemas.microsoft.com/expression/blend/2008"
    xmlns:mc="http://schemas.openxmlformats.org/markup-compatibility/2006"
    mc:Ignorable="d">

    <StackPanel Orientation="Vertical" HorizontalAlignment="Center" VerticalAlignment="Center">
        <Button x:Name="myButton" Click="myButton_Click">Click Me
        <TextBlock x:Name="QRCodeBarcode"
          Margin="10">
        <Canvas x:Name="QRCodeCanvas" Margin="10">
    </StackPanel>
</Window>
The TextBlock is used to display the text string returned by the class library. We will apply the font to this text string later in the tutorial.
6. Next, we add the C# code to encode the input data. Click on MainWindow.xaml.cs and add the following to the top of the file.
using Net.ConnectCode.BarcodeFontsStandard2D;
Locate myButton_Click function and add the following to the function.
            myButton.Content = "Clicked";
            QR qr = new QR("12345678","L",8);

            //ECL L-7% M-15% Q-25% H-30%
            //Mask 0..7 or 8 for Auto
            //There are 8 masks patterns to apply to a QR Code
            //The purpose is to make the QR Code easier to read for the scanners.

            string qrCodeStr = qr.Encode();
            QRCodeBarcode.Text = qrCodeStr;

            int squareD = 10;
            double posX = 0;
            double posY = 0;

            foreach (char c in qrCodeStr)
            {
                var rect = new Microsoft.UI.Xaml.Shapes.Rectangle();
                rect.Width = squareD;
                rect.Height = squareD;
                Canvas.SetLeft(rect, posX);
                Canvas.SetTop(rect, posY);
                if (c=='1')
                {
                    rect.Fill = new SolidColorBrush(Microsoft.UI.Colors.Black);
                    posX = posX + squareD;
                }
                else if (c=='0')
                {
                    rect.Fill = new SolidColorBrush(Microsoft.UI.Colors.White);
                    posX = posX + squareD;
                }
                else if (c == '\n')
                {
                    posX = 0;
                    posY = posY + squareD;
                }
                QRCodeCanvas.Children.Add(rect);
            }
The code above uses the Net.ConnectCode.BarcodeFontsStandard2D.QR class to generate a QR Code barcode text string using the input data "12345678", an ECL (Error Correction Level) of "L", and auto QR Code masks. A higher ECL setting generates a QR Code that can be recovered even when it is partially damaged. However, this means more redundancy is added to the QR Code, resulting in a larger QR Code in size. If you are not sure of which ECL to use, we recommend starting with "M" which provides a good balance between redundancy and size.
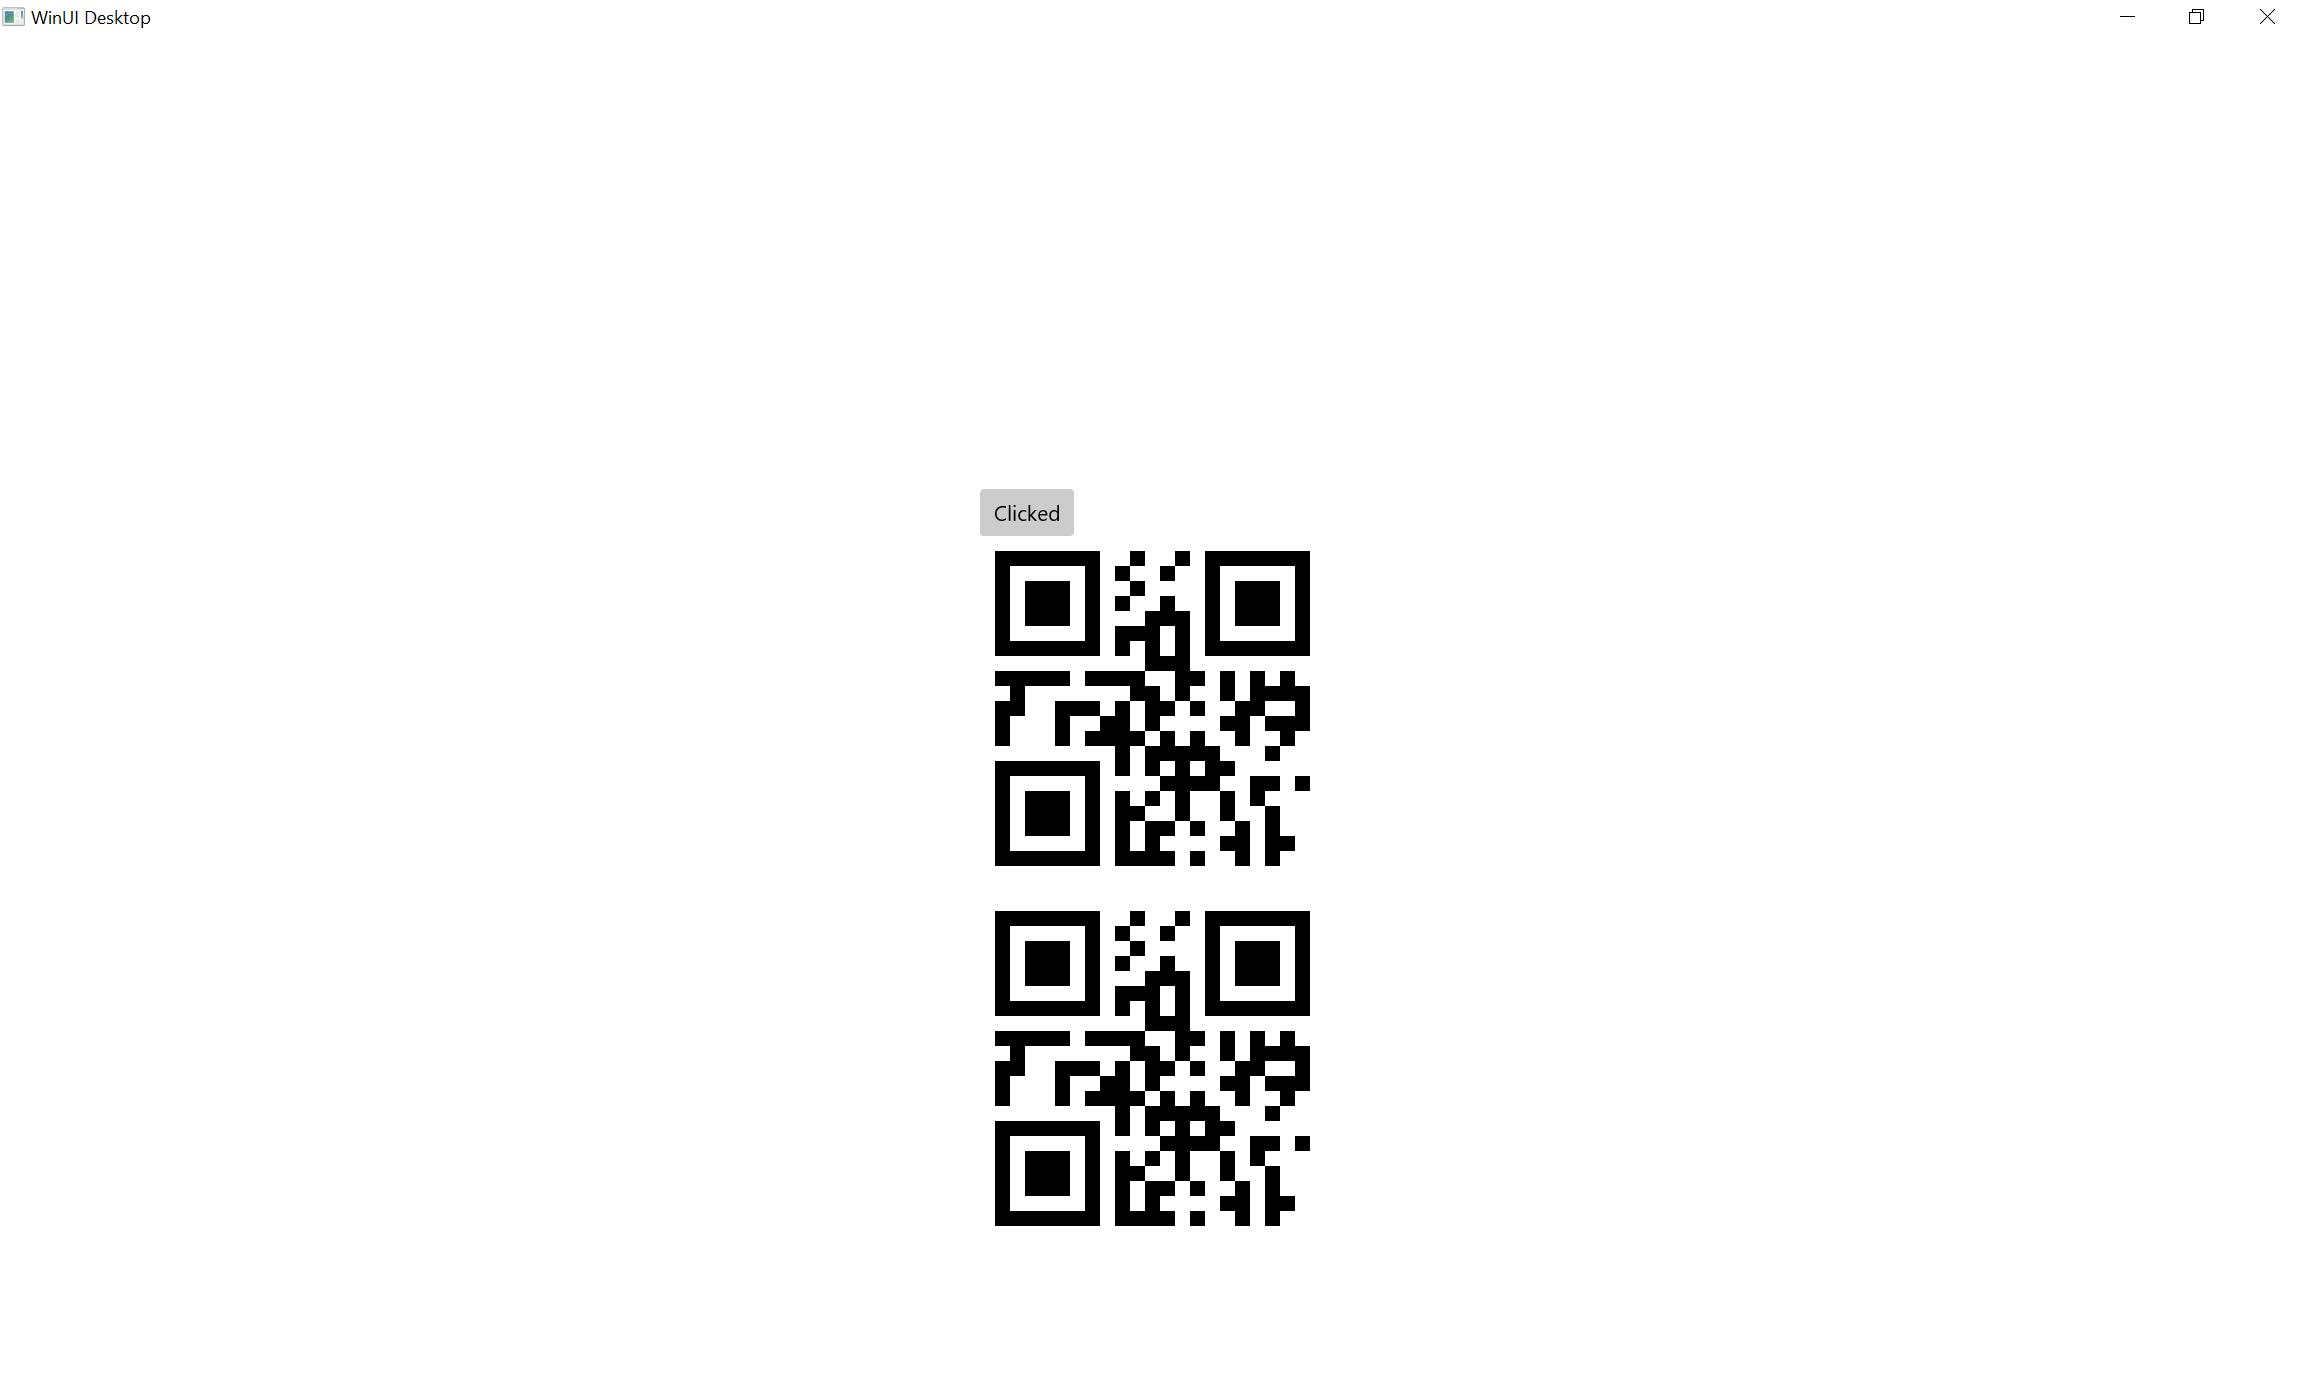
7. Run the app in Visual Studio, click on "Click Me" button to see the generated QR Code.
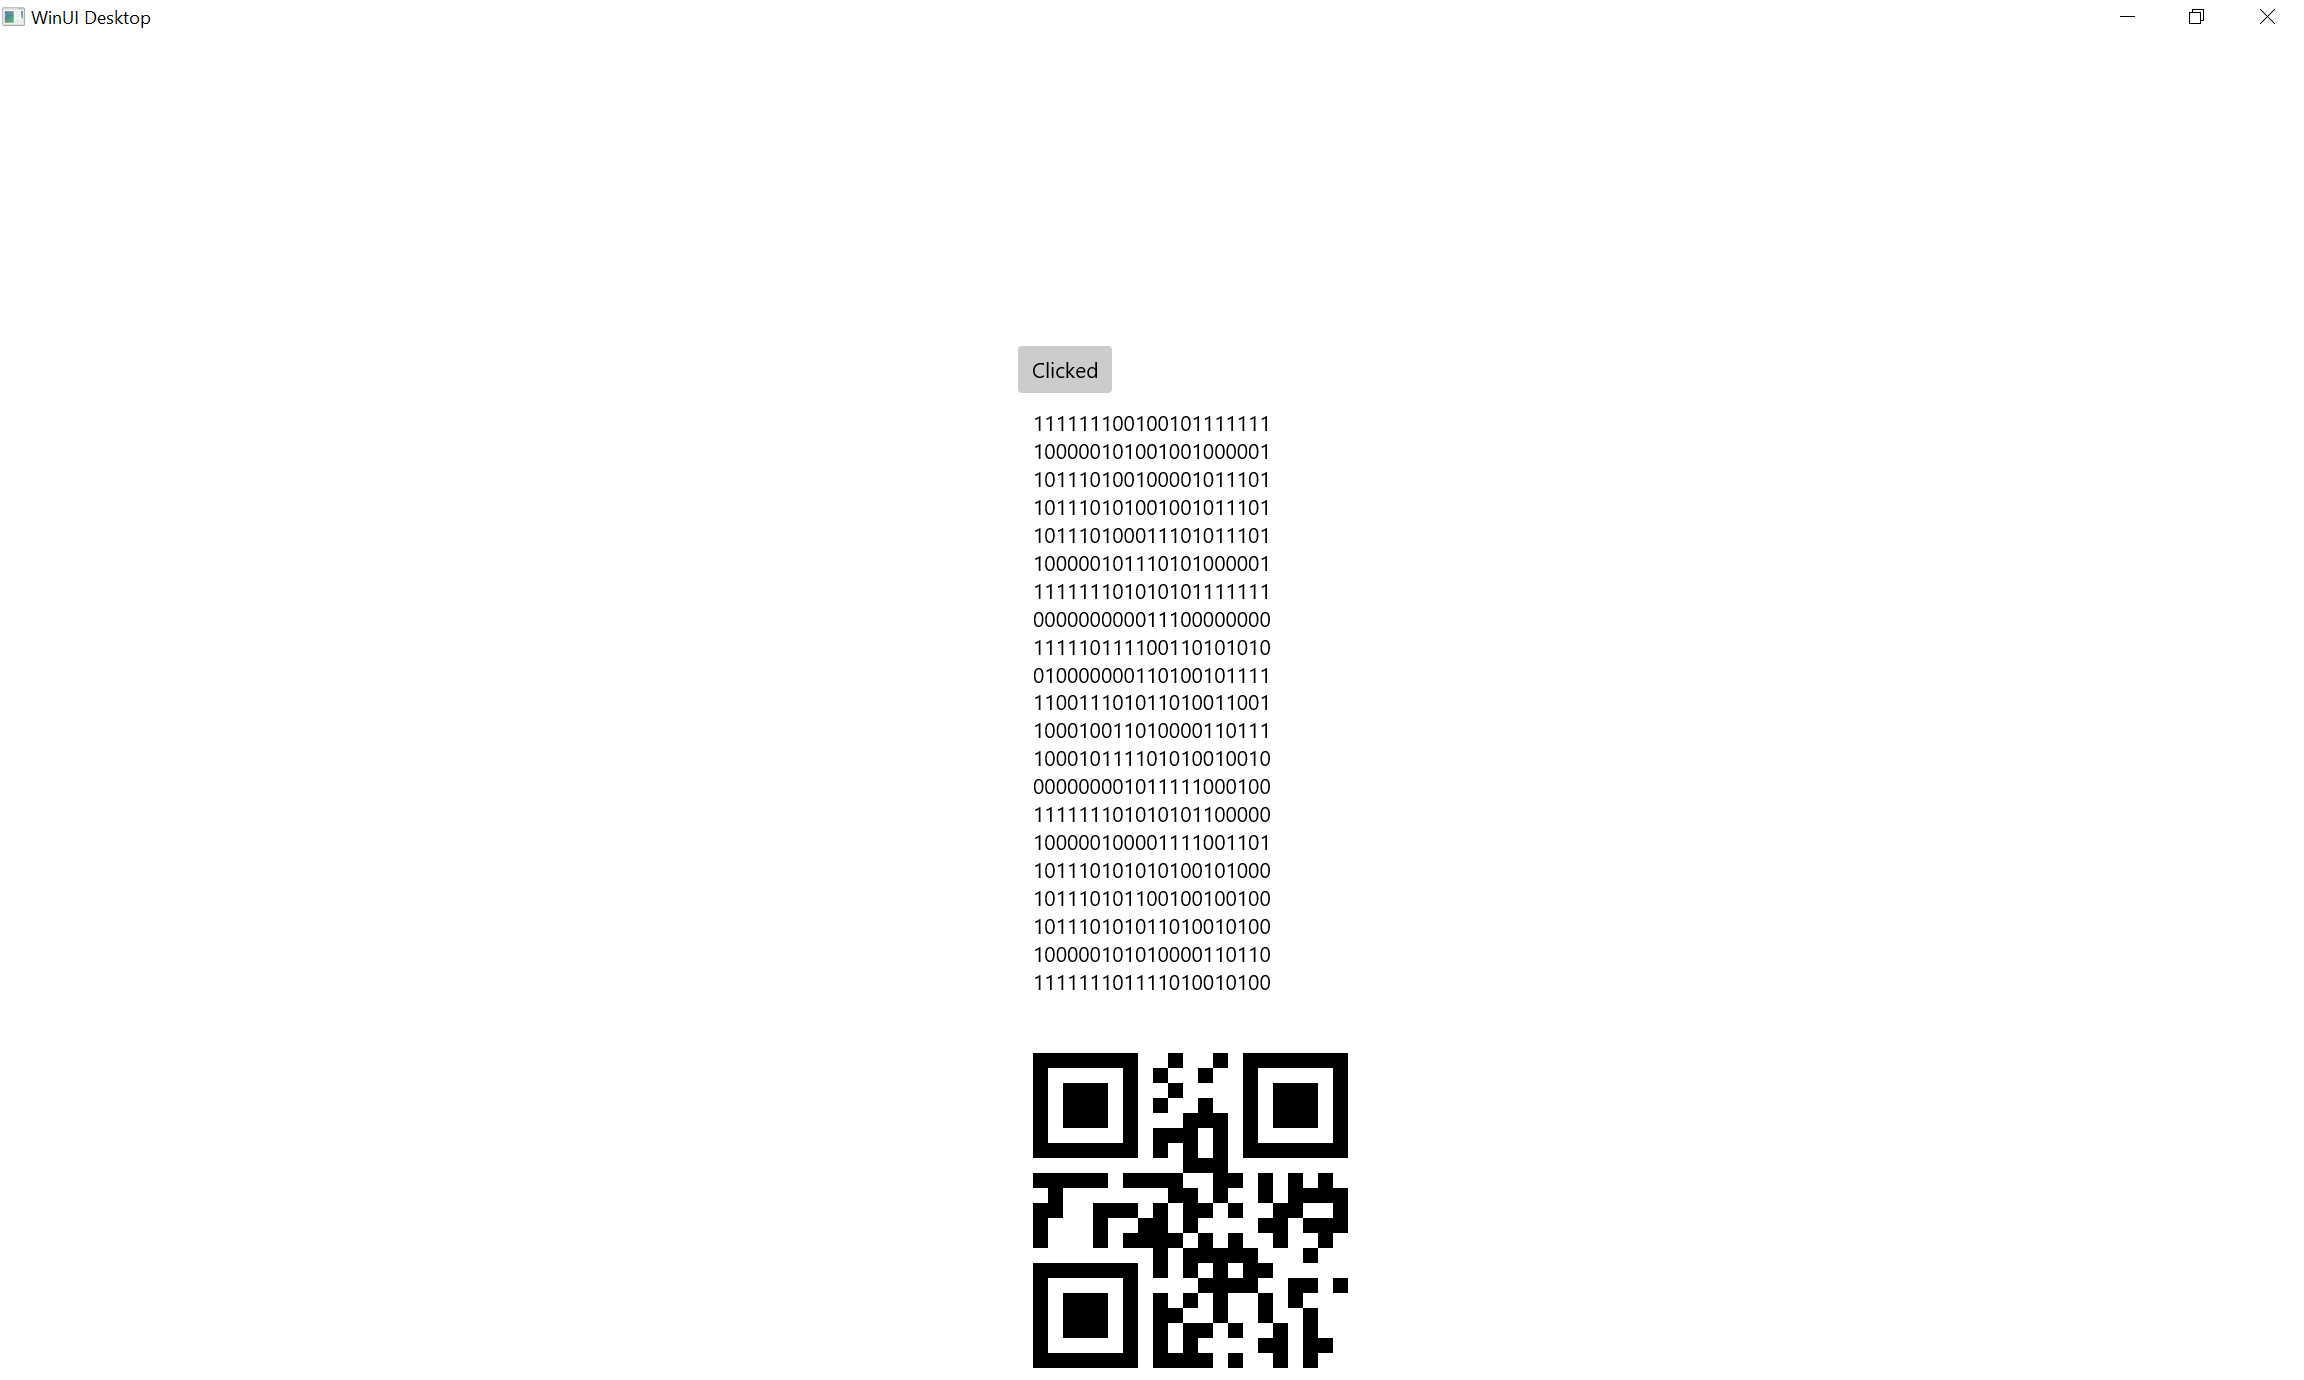
The first part after the button shows the text string of the QR Code class library. The second part shows the QR Code rendered on a WinUI Canvas.
8. We can change the raw text string above into a QR Code by applying a QR Code font. Change the code in MainWindow.xaml to the following:
<Window
    x:Class="WinUIQRCodeApp.MainWindow"
    xmlns="http://schemas.microsoft.com/winfx/2006/xaml/presentation"
    xmlns:x="http://schemas.microsoft.com/winfx/2006/xaml"
    xmlns:local="using:WinUIQRCodeApp"
    xmlns:d="http://schemas.microsoft.com/expression/blend/2008"
    xmlns:mc="http://schemas.openxmlformats.org/markup-compatibility/2006"
    mc:Ignorable="d">

    <StackPanel Orientation="Vertical" HorizontalAlignment="Center" VerticalAlignment="Center">
        <Button x:Name="myButton" Click="myButton_Click">Click Me
        <TextBlock x:Name="QRCodeBarcode"
                   FontFamily="/Fonts/CCodeQR.ttf#CCodeQR"
                   FontSize="10"
                   Margin="10">
        <Canvas x:Name="QRCodeCanvas" Margin="10">
    </StackPanel>
</Window>
If you are testing with the Trial version of the QR Code font, use the following:
FontFamily="/Fonts/CCodeQR_Trial.ttf#CCodeQR_Trial"
Run the application again and you should see the following: