About WebAssembly
WebAssembly is a web standard, developed by the World Wide Web Consortium (W3C), that defines an assembly-like binary code format (wasm) for execution in web pages. The executing code runs nearly as fast as native machine code and is meant to speed up performance of web applications significantly.
Since 2007, WebAssembly has been natively supported by all major browsers including Firefox, Chrome, Safari and Edge.
ConnectCode WebAssembly Barcode (wasmBarcode)
ConnectCode WebAssembly Barcode is a package that generates industry compliant barcodes on web pages or applications using WebAssembly (wasm) modules and Web Fonts (WOFF - Web Open Font Format).The wasm barcode module encodes the input data (validates input data, adds check characters, adds start/stop characters) and generates output characters to be displayed as barcodes with the Web Fonts.
Performance
Barcode generation using WebAssembly is fast and runs at near native performance. This is due to a wasm module being compiled and optimized ahead of time instead of being interpreted real time. This improved performance is especially important in order to achieve high-performance web pages, applications or reports that need to generate multiple barcodes in one go.Furthermore, ConnectCode WebAssembly Barcodes uses WOFF fonts to display the barcodes. Once a font is downloaded by the browser, it is cached and can be applied to display different barcodes, eliminating redundant graphical rendering and rastering. This further speeds up the performance and improves the response time to display barcodes.
Using Fonts to Display and Print barcodes
Using fonts to display and print barcodes is well known and widely adopted in the auto-id industry. As a font raster to the output device and are not limited to DPI (Dots per Inch) of the computer screen, a barcode generated using fonts is of the highest quality and can meet the strictest requirements required by the industry.Supported Browsers
WebAssembly is a new standard and is supported by modern browsers. ConnectCode WebAssembly Barcode (wasmBarcode) has been tested and certified to run on the following browsers.
- Microsoft Edge 42.17134.1.0 (or above)
- Google Chrome 65.0.3325.181 (or above)
- Android Chromium v64.0.3282.137 (or above)
- macOS Safari 11.1 (or above)
- iOS Safari 11.3 (or above)
- Mozilla Firefox Quantum 59.0.2 (or above)
Application Programming Interface (API)
Tutorial on generating a Code 128 Auto barcode using WebAssembly
In this tutorial we are going to use a WebAssembly Barcode module and WOFF (Web Open Font Format) Barcode Fonts included in the ConnectCode Barcode Fonts and Software package to generate a Code 128 Auto barcode. The steps involved creating a HTML5 page from scratch and then including the necessary JavaScript and wasm module files. A Javascript file is still required to load the wasm module and bridge the necessary API (Application Programming Interface) call from HTML to the wasm module.Note
The "Resource" subfolder of ConnectCode Barcode Fonts and Software contains a “WebAssembly” subfolder that includes samples for generating all the different types of linear 1D barcodes.
For our registered users, if you do not see the "WebAssembly" folder, please contact us for your free upgrade under your Software Maintenance License.
Prerequisites
- ConnectCode Barcode Fonts and Software is installed.
- A browser that supports WebAssembly and the File URI scheme. A browser that supports the File URI scheme is not required if you are using a web server to test your web pages.
2. Using "Windows Explorer", navigate to the "Resource\WebAssembly\Code128Auto" subfolder. If you want to generate other types of barcodes e.g. EAN13 barcode, simply navigate to the "Resource\WebAssembly\EAN13" folder.
Note - If you are using the msix style installer for Windows 11, the "Resource\WebAssembly" folder is in the "Resource.zip" file.
3. The "Code128Auto" folder contains several files. We are going to use the following:
- fonts folder
- code128auto.js file
- code128auto.wasm file
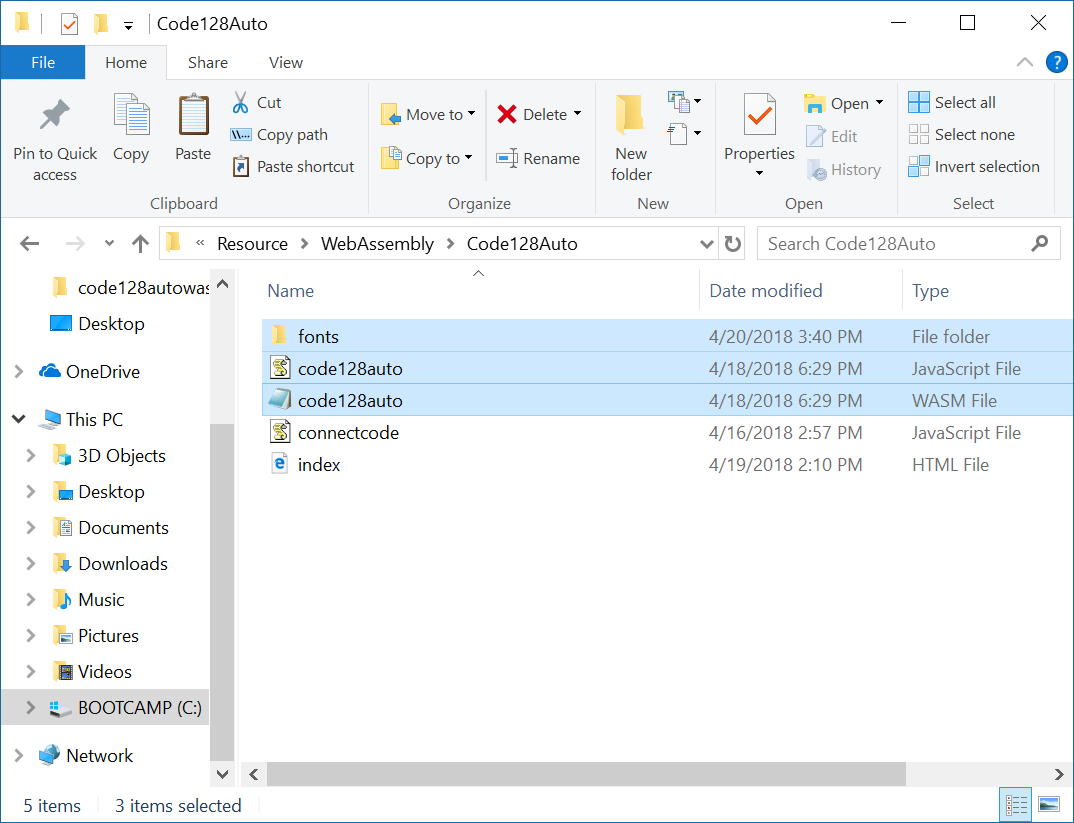
The "code128auto.wasm" file is the WebAssembly module for the Code 128 Auto barcode. The "code128auto.js" file is the JavaScript file that you include in your HTML page to load and instantiate the wasm module. The JavaScript file also provides the bridge to create a Class object to invoke the wasm module.
The “fonts” folder contains the WOFF barcode web fonts for the Code 128 Auto barcode. It contains web fonts with the ".woff" suffix. If you are a user of our Javascript (or Typescript module) package, you may have noticed that the ".eot" and ".otf" font files are not included in this folder. These font files which are included for browsers backward compatibility are not required as all the browsers that support WebAssembly also support WOFF fonts.
Create a NEW "code128auto" folder on your desktop and copy the above folder and files into the "code128auto" folder. Please note we do not copy the "index.html" file as we are going to create one from scratch.
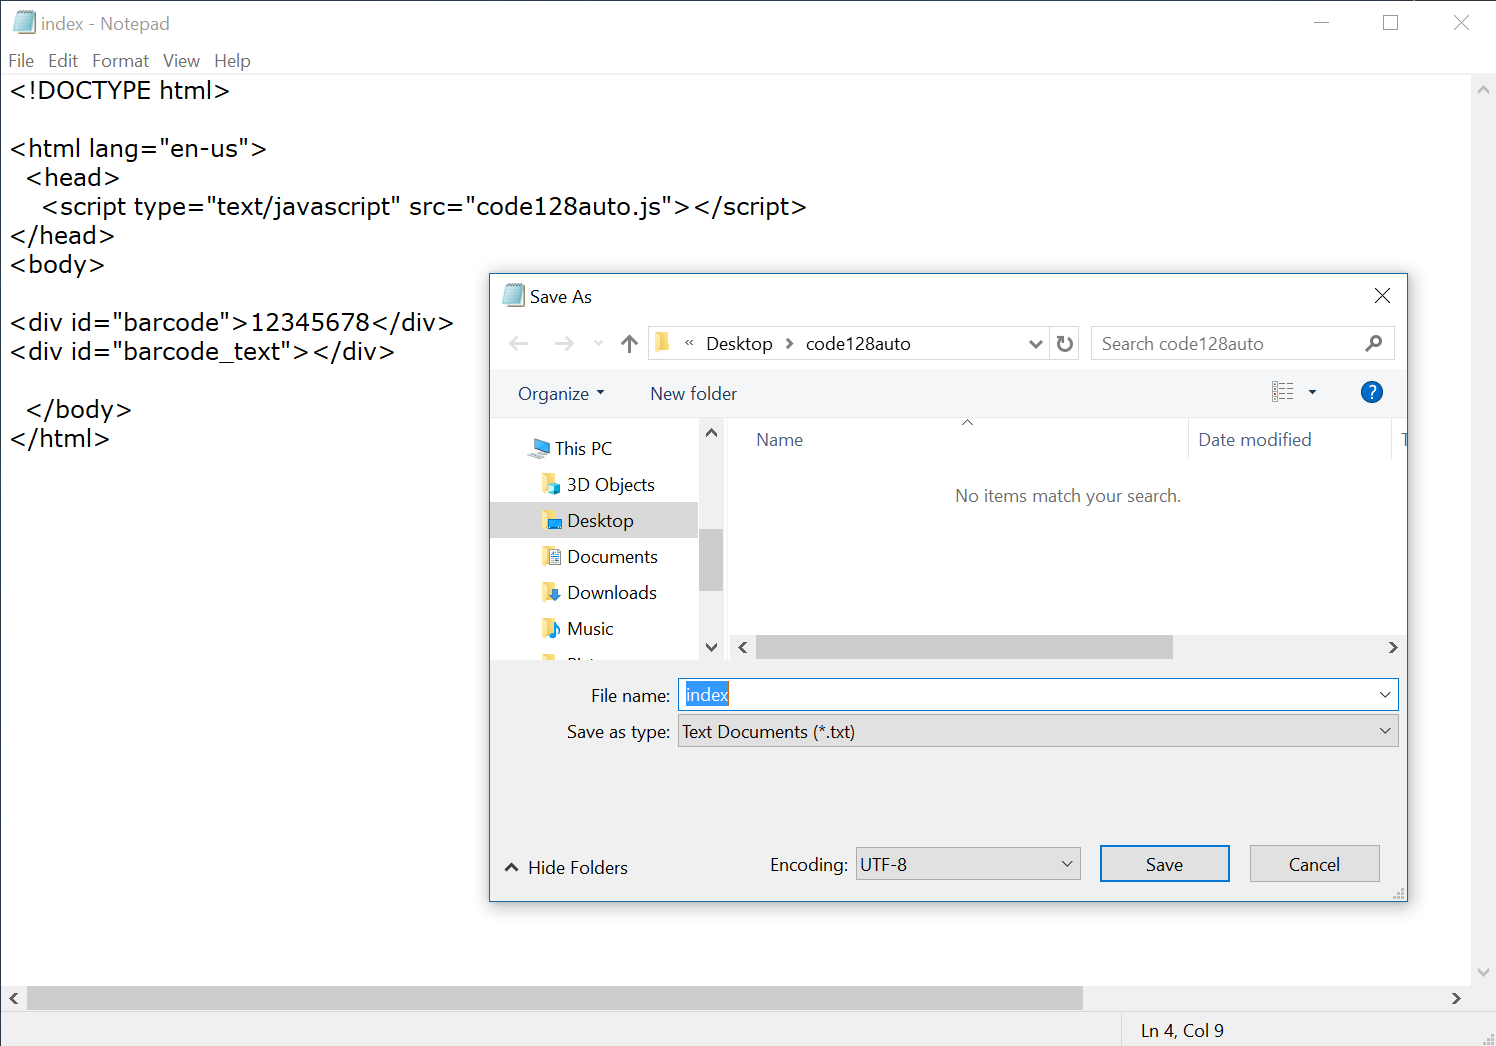
4. Launch "Microsoft Notepad" and enter the following:
<!DOCTYPE html>
<html lang="en-us">
  <head>
    <script type="text/javascript" src="code128auto.js"></script>
</head>
<body>

<div id="barcode">12345678</div>
<div id="barcode_text"></div>

  </body>
</html>
This is a HTML5 compliant web page which includes the "code128auto.js" file. Remember we have previously mentioned that the “code128auto.js” helps load and instantiate the WebAssembly module. We have also created two "div" elements. The "barcode" element supplies the input data and once the WebAssembly module encodes the input data, the output will be placed into this element.
The "barcode_text" element is a place holder for the Human Readable Text of the barcode, the text characters that we commonly see below a barcode. We recommend using the returned value provided by the wasm module as it displays the value encoded into the barcode. In some circumstances, mandatory check characters will be automatically added into your input data and the returned Human Readable Text value will reflect this. Some barcodes such as GS1 128 also have requirements on how to display the Human Readable Text which is strictly adhered to by the returned value of the wasm module.
5. Click on "File->Save as" in "Notepad". Save the file as "index.html" into the "code128auto" folder on your Windows Desktop as shown below.
Note
Remember to save the file with a ".html" suffix.
6. Next we are going to enter the programming codes to generate the barcode. Enter the following Javascript into "index.html".
	<script  type="text/javascript" >
	Module['onRuntimeInitialized'] = onRuntimeInitialized;
	function onRuntimeInitialized() {

		var barcodeobject = document.getElementById("barcode")
		var barcodetextobject = document.getElementById("barcode_text")
		var instance = new Module.Code128Auto(barcodeobject.innerHTML);
		barcodeobject.innerHTML=instance.encode();
		barcodetextobject.innerHTML=instance.humanReadableText;
		instance.delete();
	}
	</script>
You can place the contents as shown above below the following line.
<script type="text/javascript" src="code128auto.js"></script>
What the script does is to define a callback function for "onRuntimeInitialized" which will be called only when the WebAssembly Barcode module has been loaded (by “code128auto.js”) completely. If your network is slow in loading the wasm module, you can be assured that the codes in the script will not be executed on an incomplete module.
The first two lines of the script gets the "barcode" and "barcode_text" DOM (Document Object Model) objects from the HTML page. Remember that the "barcode" div element contains our input data.
The next four lines of Javascript codes call the wasm module and are explained below.
var instance = new Module.Code128Auto(barcodeobject.innerHTML);
//Create an instance of the Code128Auto object from the wasm module and pass in
//barcodeobject.innerHTML as the input data (“12345678”).
//Some barcodes such as Code39 allows you to specify whether the check digit is turned on.
//You can specify 1 to turn it on or 0 to turn it off.
//var instance = new Module.Code39(barcodeobject.innerHTML,1);
//The check digit is mandatory in the Code 128 barcode.

barcodeobject.innerHTML=instance.encode();
//The instance.encode method validates and removes unsupported characters,
//generates the check digit and adds the necessary start and stop characters.
//The encoded output is placed back into barcodeobject.innterHTML.

barcodetextobject.innerHTML=instance.humanReadableText;
//When the encode function is called, the Human Readable Text
//(the characters that appears below a barcode), is also generated.
//You can retrieve the Human Readable Text output through the property above.

instance.delete();
//Removes the barcode object instance.
//You can also call the following functions and continue to use the instance to
//generate barcodes with other input data before removing it.
//instance.setInputData("1234567890");
//instance.setCheckDigit(1);
//setCheckDigit function is only available for specific barcodes.
7. Save the "index.html" file. Upload the "code128auto" folder to your web server to test out the page with the different browsers. You can also use the "emrun" command (from Emscripten) or other tools to view the HTML page via locally launched web server.
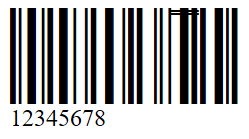
You should see the following output:
í,BXnOî
12345678
If you see other output, you are either using a browser that does not support wasm modules or the “file://” protocol.
The first line contains the encoded output of the barcode. The second line contains the Human Readable Text of the barcode.
8. Our final step is to apply the WOFF barcode font on the encoded output. Enter the following into "Notepad".
<style type="text/css" media="screen,print">
  @font-face {
    font-family: CCode128_S3_Trial;
    src: url("fonts/ConnectCode128_S3_Trial.woff") format("woff");
  }
  #barcode {font-weight: normal; font-style: normal; line-height:normal;
	font-family: 'CCode128_S3_Trial', sans-serif; font-size: 32px}
</style>
You can place the contents above just below the following line and before the script entered in step 6.
<script type="text/javascript" src="code128auto.js"></script>
The "style" element specifies a "@font-face" tag to use the "ConnectCode128_S3_Trial.woff" web font. The font is then applied to the "barcode" object.
9. Launch the "index.html" file in your browser again. You should see something similar to the screenshot below.
This is a Code 128 Auto generated with a wasm barcode module and displayed with a WOFF Barcode Font. If you are using the trial version, you may see horizontal lines markings in the barcode. Please be assured that the horizontal lines do not affect the scanning of the barcode for testing purposes. Also, the fonts in the registered version do not contain the horizontal lines.
There are other things that may be of concern to you, for example, the centering of the Human Readable Text. You can now go back to open the "index.html" in the "C:\Program Files (x86)\ConnectCode\WebAssembly\Code128Auto" folder (or "C:\Program Files (x86)\ConnectCodeTrial\WebAssembly\Code128Auto").
This HTML file illustrates how to center the Human Readable Text and define the barcode in a fixed width "div" element.
You may have noticed that the HTML includes an additional "connectcode.js" file. This file implements the "onRuntimeInitialized" function that you have implemented in step 6 with some enhancements. The changes are highlighted below.
The "connectcode.js" file looks like the following:
var elements=document.getElementsByClassName('barcode');
var elementsHR=document.getElementsByClassName('barcode_text');
var instance = new Module.Code128Auto();

for (x=0;x<elements.length;x++)
{
	instance.inputData = elements[x].innerHTML;
	elements[x].innerHTML=instance.encode();
	elementsHR[x].innerHTML=instance.humanReadableText;
}

instance.delete();
The code above loops through all "div" elements with the "class=barcode" attribute and then use the wasm module to generate the encoded barcode output for each of them.
The following shows how the HTML file looks like with multiple “barcode” div elements:
.
.
.
<head>
<style type="text/css" media="screen,print">
  @font-face {
    font-family: CCode128_S3_Trial;
    src: url("fonts/ConnectCode128_S3_Trial.woff") format("woff");
  }

  .barcode {font-weight: normal; font-style: normal; line-height:normal;
	font-family: 'CCode128_S3_Trial', sans-serif; font-size: 32px}

</style>
.
.
.

</head>
<body>

<div style="width:5in">
<center>
<div class="barcode">1234567</div>
<div class="barcode_text"></div>
</center>
</div>

<br /><br />

<div style="width:5in">
<center>
<div class="barcode">12345678</div>
<div class="barcode_text"></div>
</center>
</div>
<br /><br />
</body>
.
.
.
The “style” element defines a font with a “font-size” of 32. You can easily change the size of the barcode by changing the “font-size”. Most of barcode fonts provided in ConnectCode Barcode Fonts and Software package also come with different font heights. With this 2 parameters and configuration, you will be able to generate barcodes that meet all the different requirements required by the auto-id industry.