Windows Azure is an open and flexible cloud computing platform created by Microsoft for developing software applications that runs
on a global network of datacenters. This platform equips developers with capabilities for building websites, running applications
and infrastructure on virtual machines and managing data through SQL Azure or Storage services.
Create barcodes on the Cloud
This tutorial shows how to generate standards-compliant barcodes on Windows Azure using ConnectCode Barcode Web Fonts.
Using a web font to generate barcodes has several advantages. A font rasters to the resolution of printer and would create
barcodes of the highest quality that meet the strictest industry standards. This approach also allows easy integration
with different cloud platforms with minimal or no code changes.
To create a barcode using a web font is a simple two-step process: the first is to encode input data to
generate barcode characters and the second step is to apply the fonts
on the encoded characters to render the barcode. During the encodation process, input data is verified and trimmed as
some barcodes only support a subset of the ASCII characters. Start/Stop and check characters required by industry barcode specifications
are also added automatically.
There are two ways of encoding input data. The first method uses Javascripts
and the second uses a .Net DLL (Dynamic Link Library). Both the scripts and DLL are provided by our ConnectCode Barcode Software and Fonts package.
This offers flexibility to our developers to either perform encodation on the presentation web tier (via the Javascripts)
or in the business/data tier (via the DLL).
More about Barcode Web Fonts
ConnectCode Barcode Web Fonts uses a technology defined by the W3C (World Wide Web Consortium) that enables people
to use fonts on demand over the web without installation in the operating system. The generated barcodes are compatible across different
browsers such as Internet Explorer, Safari, Opera, Mozilla Firefox, Google Chrome and on mobile browsers such as those on running on iOS,
Android and Windows Phone/Windows 8. For a complete list of supported browsers, please see
This tutorial creates the Code 128 barcode specifically. However you can easily adjust it to create Code 39, EAN13, GS1-128, UCCEAN, I2of5, Industrial 2 of 5,Modified Plessy, ITF14, UPCA, EAN8, GS1 Databar14
and many other barcodes supported by our barcode web fonts.
Tutorial
In this tutorial, step 1 to step 9 illustrate how to encode and generate barcodes using Javascripts and Web Fonts. The
second portion from step 10 onwards, illustrates the use of a .Net DLL to encode the barcodes in the ASP.Net Code-Behind.
1. Right click on Visual Studio (2010 or 2012) and Run as Administrator.
This is to ensure that Visual Studio has the necessary permissions to run the Windows Azure tools correctly.
Click Yes when you are prompted with the message "Do you want the following program to make changes to this computer?"
2. Go to File->New->Project->Templates->Visual C#->Cloud and select Windows Azure Cloud Service.
This tutorial focuses on using C# but you can also choose to use Visual Basic as the language.
Note : If you see the "Get Windows Azure SDK for .NET" on the dialog, it means the Azure SDK is not yet installed. In this case, you will need to double click on the button to install the SDK on your PC.
2a. Select .Net Framework 4.0 or 4.5 and click on the Ok button.
2b. In the .Net Framework roles, select ASP.Net Web Role and add it to the Windows Azure Cloud Service solution. Click OK and Visual Studio will proceed to create the project.
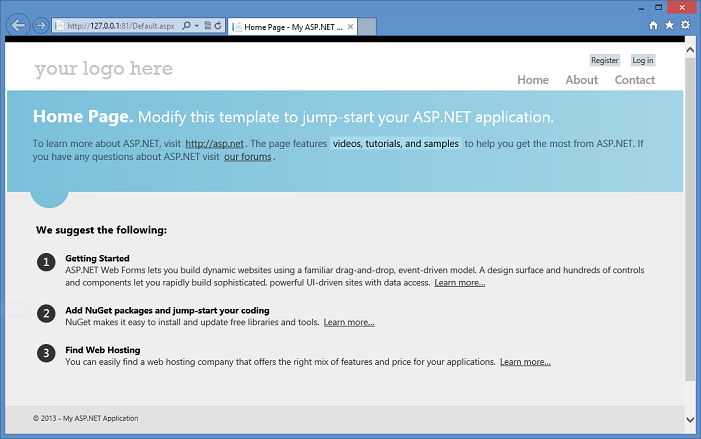
3. At this point, you may want to click on Debug->Start Debugging to test the generated project immediately. This is to ensure that you are able to
run the generated code before any changes are made.
Please wait until you see the Internet Explorer is launched and the screen as shown below is displayed. The screenshot below is the output captured for Visual Studio 2012. For Visual Studio 2010, it may look slightly different.
If you encounter errors such as the IISconfigurator.exe error, please check out MSDN blogs/forums to resolve the issues. In our labs,
we resolved some issues by adding "IIS Management Console" in "Windows Feature".
4. Next we are going to add the barcode web fonts into the project.
4a. Right click on WebRole1, select Add->New Folder and name the folder as "Fonts".
4b. Right click on the "Fonts" folder and select Add->Existing Item.
Go to <ConnectCode Barcode Software and Fonts directory>\Resource\webfonts\javascript\code128auto\Fonts
and add the following files :
ConnectCode128_S3_Trial.eot
ConnectCode128_S3_Trial.otf
ConnectCode128_S3_Trial.woff
Three Code 128 font files of OTF (Open Type), EOT (Embedded Open Type), Web Open Font Format (WOFF) formats are added to the project.
ConnectCode provides a pair of font files for each type of barcode (of each specific size) to ensure that you can generate barcodes
that on different browsers and platforms, including older versions but widely-used browsers.
In the later part of the tutorial, you will notice that we make use of CSS to utilize the optimal font on the different browsers.
Note - If you want to encode other barcodes, select the fonts from a different directory.
5. Next we are going to add the Javascripts for encoding the barcode into the project.
5a. Right click on WebRole1->Scripts and select Add->Existing Item.
5b. Select the file "connectcode-javascript-code128auto.js" in the \Resource\webfonts\javascript\code128auto\js directory.
This is the Javascript used for encoding the Code 128 (Auto) barcode. If you would like to encode a different type of barcode, simply select the script from a different directory.
6. All the necessary font files and encoding scripts have been added. We are now going to modify the Default.aspx file to display the barcode. First, double click on the Default.aspx file.
For Visual Studio 2012, immediately after the following line:
The above HTML code includes the code 128 barcode encoding scripts into Default.aspx and also defines a font-face for a font family known as CCode128_S3_Trial.
The font-face references .eot, .woff and .otf files in the remote Fonts directory and uses them to style the font of the div element #javascriptbarcode.
It is interesting to note that the font-face also references the local machine for a font name CCode128_S3_Trial using 'local("CCode128_S3_Trial")'.
This is not required for actual deployment but only to illustrate how to reference a font in the local machine.
7. Next, we are going to add content that contains the input data to Default.aspx.
For Visual Studio 2010/2012, immediately after the following line :
<h3>Barcode encoded with Javascript:</h3>
<br />
Input : 12345678<br />
Barcode : Code128<br />
Check Digit : N.A.<br />
Font Name : ConnectCode128_S3_Trial<br /><br />
Output : <br /><br />

<div style="width:5in;text-align:center">
    <div id="javascriptbarcode">12345678</div>
    <div id="javascriptbarcode_text"></div>
</div>
<br /><br />
<i>Note : The trial font will add a few horizontal lines to the barcode.</i>

<script type="text/javascript">

    function get_object(id) {
            var object = null;
            if (document.layers) {
                object = document.layers[id];
            } else if (document.all) {
                object = document.all[id];
            } else if (document.getElementById) {
                object = document.getElementById(id);
            }
            return object;
    }

get_object("javascriptbarcode").innerHTML =
 ConnectCode_Encode_Code128Auto(get_object("javascriptbarcode").innerHTML, 1);
get_object("javascriptbarcode_text").innerHTML = Get_HRText();
</script>
The first part of the code above is in HTML and the second part is in Javascript. The data to be encoded as a barcode is defined in the following line:
<div id="javascriptbarcode">12345678</div>
The following line is the Javascript that encodes the data above:
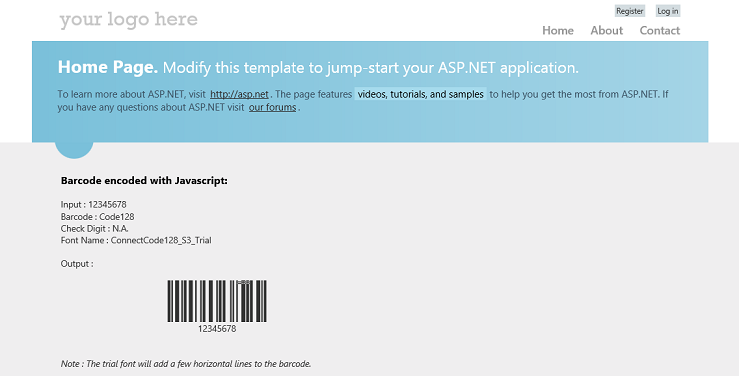
8. We are now ready to check whether we have successfully generated the Code 128 barcode. In Visual Studio, click on the Run (or Run Internet Explorer) toolbar button. You should be able to see the Internet Explorer launched as shown in the screenshot below.
The barcode is generated with Javascripts and Barcode Web Fonts. You can upload this project to your IIS server and test that the fonts are streamed to your browsers without requiring
any fonts installation.
This HTML page can also be printed and the barcode easily scanned without any resolution issues. This is a barcode that can help you meet very strict industry requirements required by organizations such as GS1.
9. The first part of using Javascript and Barcode Web Fonts to generate barcodes is completed. We will now proceed to encode the barcodes using a .Net DLL (Dynamic Link Library).
Click on the Stop Debugging toolbar button.
10. First, we are going to add a .Net DLL to perform the barcode encoding to the project.
10a. Right click on WebRole1->References and select Add Reference. Click on the Browse button. Navigate to the following directory.
<ConnectCode Barcode Software Fonts directory>\Resource\Net DLL Integration Samples\.Net4.0
And select the following DLL :
ConnectCodeBarcodeFontsLibrary.dll
11. Next, double click on Default.aspx.cs file. In the Page_Load function, add the following blocks of C# code.
Note : BarcodeFonts is a class in the package Net.ConnectCode.Barcode so it is important to remember to add the "using Net.ConnectCode.Barcode;" line at the top of this class.
In the above block of C# codes, we have setup the type of barcode using the "BarcodeType" property and the data to be encoded in the "Data" property.
The encode() function is the method that performs the encodation and adds all the necessary start/stop and check characters.
Finally the output is placed in the barcode and barcode_text div element with the following:
<h3>Barcode encoded with ASP Code-behind:</h3>
<br />
Input : 12345678<br />
Barcode : Code128<br />
Check Digit : N.A.<br />
Font Name : ConnectCode128_S3_Trial<br /><br />
Output : <br /><br />

<div style="width:5in;text-align:center">
    <div id="barcode" runat ="server">123456789</div>
    <div id="barcode_text" runat ="server"></div>
</div>
<br /><br />
<i>Note : The trial font will add a few horizontal lines to the barcode.</i>
Remember to place the 'runat ="server"' attribute in the barcode and barcode_text elements. This will allow the programming codes in the ASP.Net Code-Behind to access the elements.
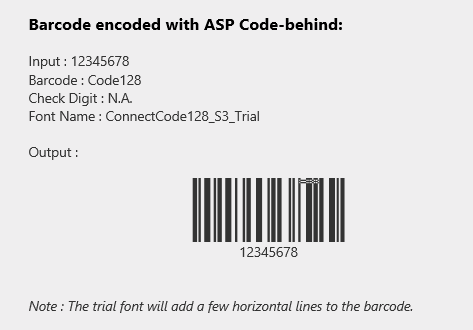
13. Click on the Run (or Run Internet Explorer) toolbar button in Visual Studio and this time you should see a second barcode displayed. This barcode is encoded with the .Net DLL
in the ASP.Net Code-Behind.
Sample Project File
A sample project (VS2012) of this tutorial is provided below: